

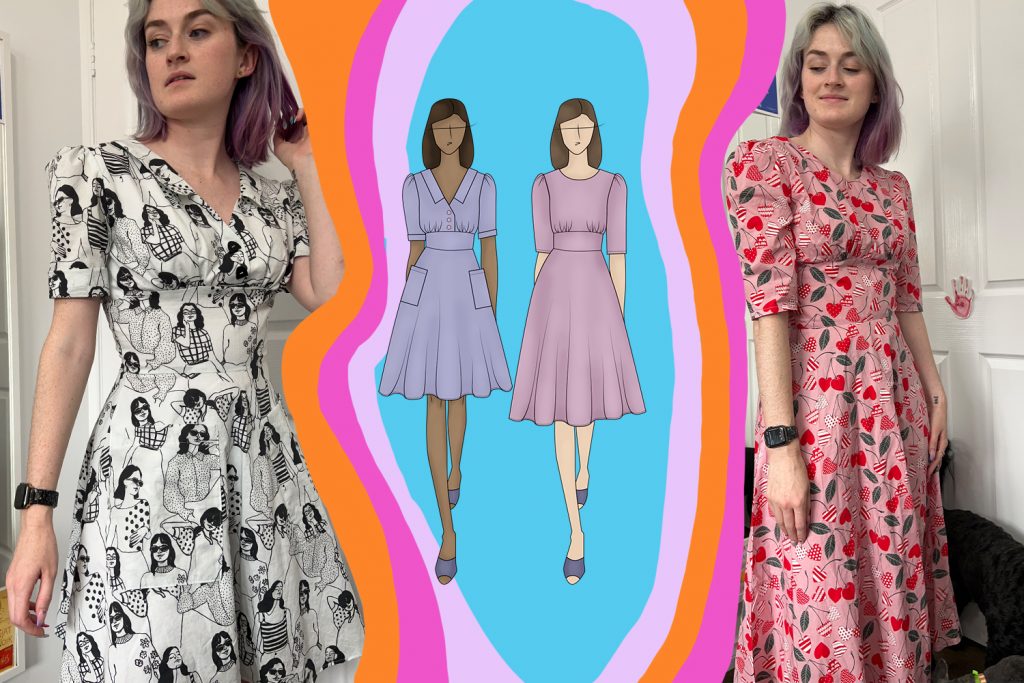
My New Pattern – Winnie & Mabel Dress
November 19, 2022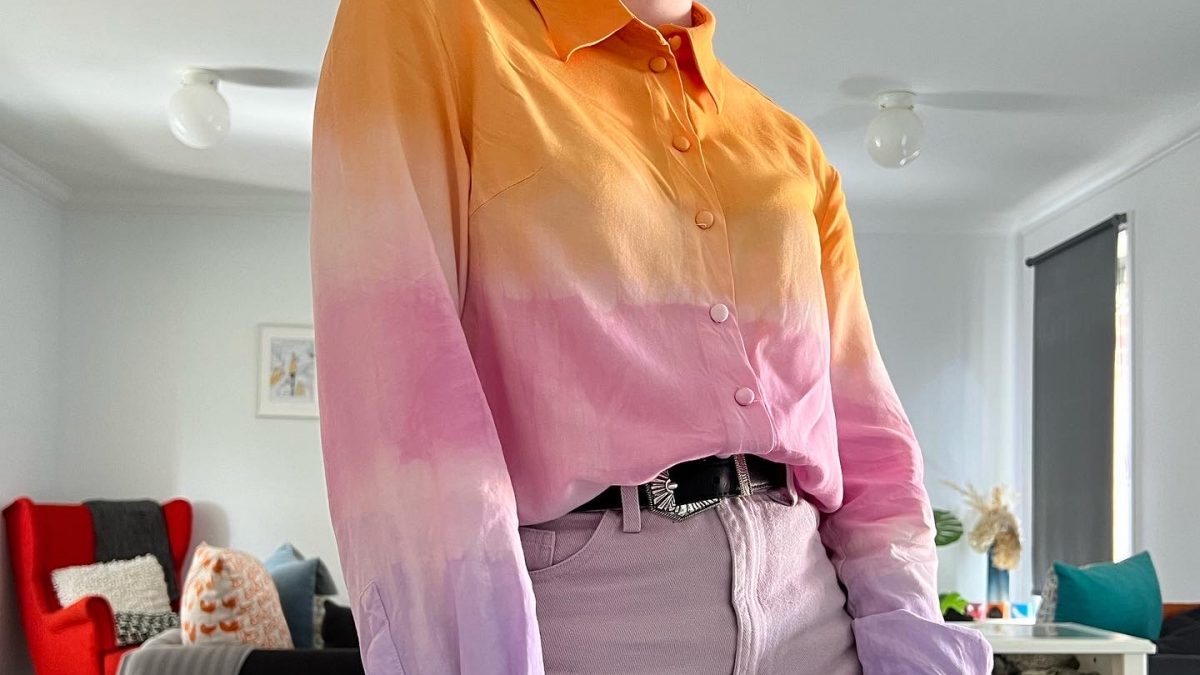
I recently made this fun shirt based off one I saw at Gorman. I used the Viki Sews Kaia Blouse and a plain rayon from spotlight. Below I’ll go through the process I went through to dye it up, you can do this with any garment or fabric you like!
What you need:
- Dyes, as many colours you want, I used 4 Rit dyes, Tangerine, Violet, Royal Blue mixed with Purple.
- Gloves
- A bucket, tub or sink (somewhere to hold the dye)
- The piece you want to dye
- Optional – salt, this will help the dye hold better, follow any additional directions on your dye packet.
Tips for dying:
- Natural fabrics are best. I used a 100% rayon fabric, anything 100% natural will dye best.
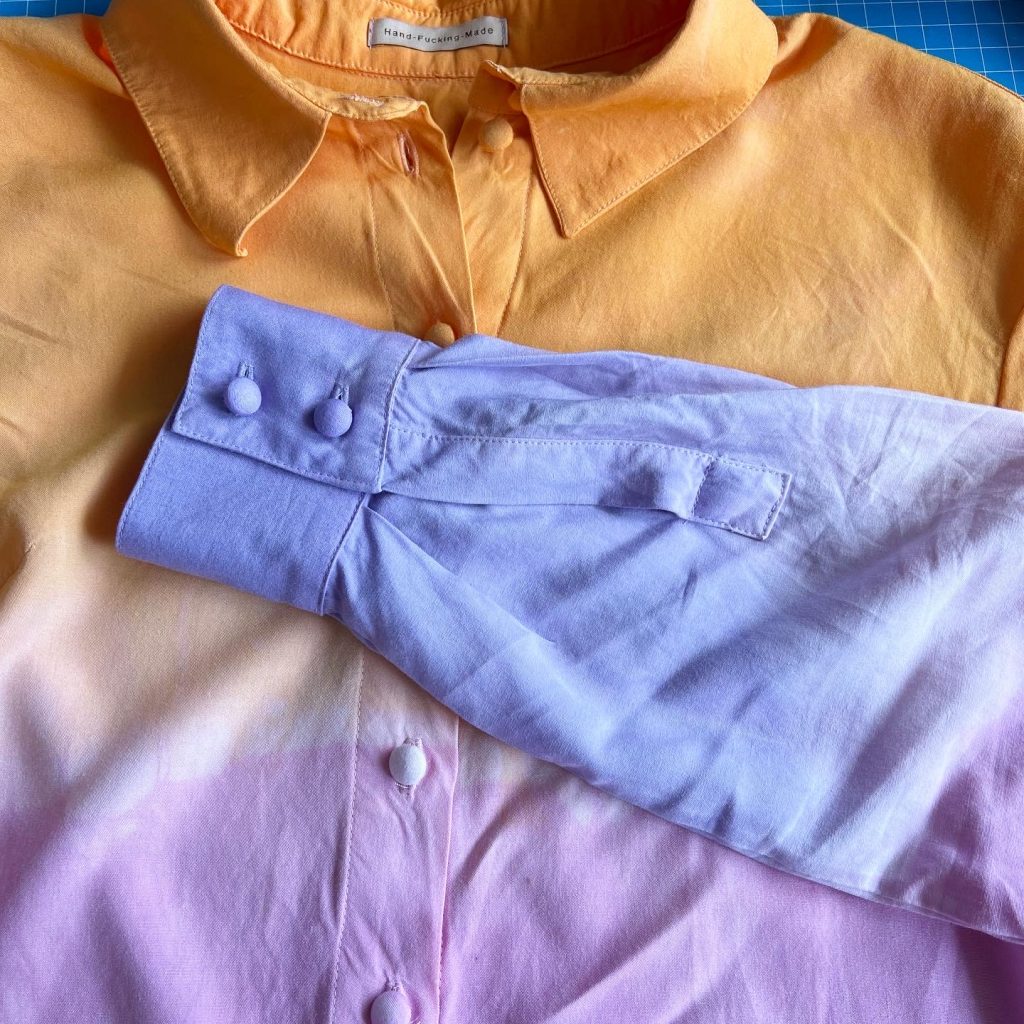
This also includes thread and any trims you use. Guterman sells 100% cotton thread, or if you want a bit more strength I suggest Rasant thread which is cotton wrapped with a polyester core. I used Rasant on mine and you can see the thread dyed up perfectly with the fabric.
If you use a polyester thread or fabric it won’t hold the dye, you can buy synthetic fabric dyes, but my experience they often don’t hold quite as well or show as vibrant. - Leave off anything you don’t want dyed, I kept the label off until after dying, although this is polyester I wanted to be sure it didn’t get tinted. If you have buttons I suggest leaving these off too, unless like me you are using self-covered buttons and want the buttons to match when dyed. Added before dying will make them match the ombre perfectly.
- Pre-wash your fabric, this should be a standard when sewing with natural fabrics for shrinkage but for dying it is also needed for clearing any treatments on the fabric. Don’t use any fabric softeners or anything that’ll leave a film on thefabric.
- Keep a few scraps of the fabric handy for testing the colour of your dye. Remember it will dry lighter.
- Don’t cut your button holes yet. As you will be washing and agitating the garment a lot having uncut buttonholes will prevent fraying. Even if using fray stop, I would not suggest dying cut button holes , it may dye ok but I’m not confident it would
- White and light colours dye best, I suggest dying white for more true to colour dying.
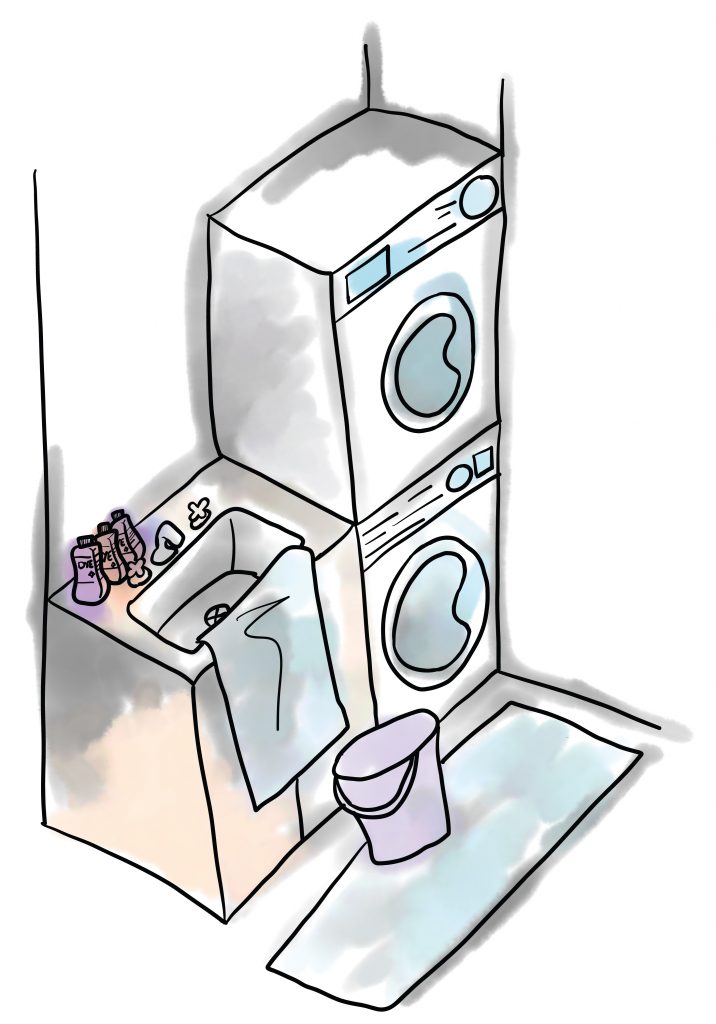
Set up your space:
I used my laundry as if any dye spilt it would be ok in this room. I also covered the floor with towels and wore old clothes.
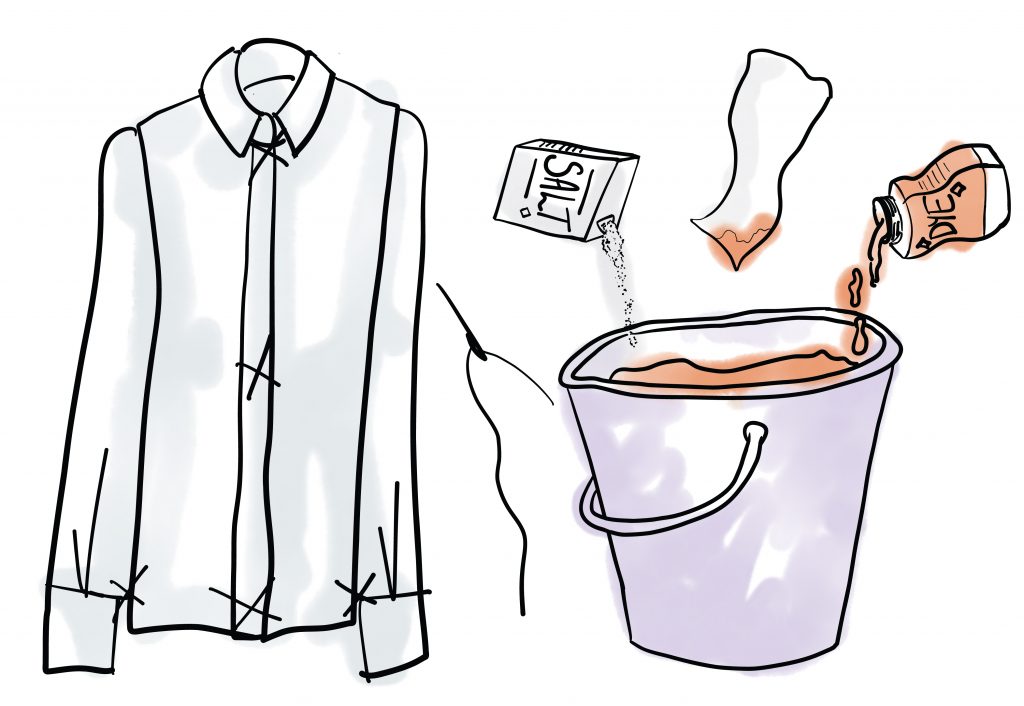 Prep your garment:
To keep the ombre even I suggest securing any loose parts of the garment such as sleeves or where it buttons up. I added very loose stitched tacks to the front to keep the button wrap in place, and the sleeves to the sides so the ombre would match the levels along the sleeves and body.
Soak your garment in clean water, it should be wet/damp but not dripping.
Now Let’s get Dying!
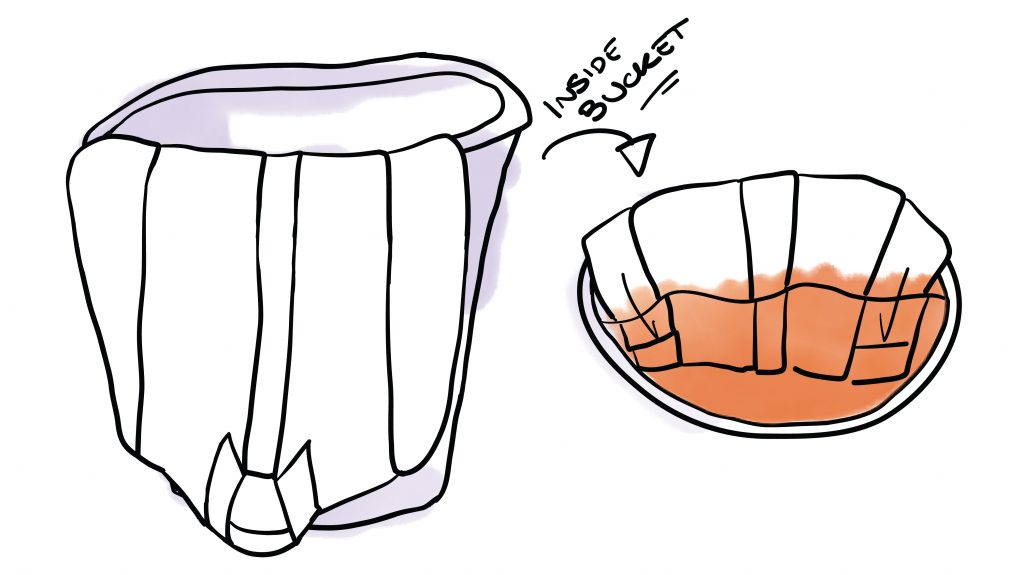
1. Fill your bucket (or whatever container you are using) with hot water, as hot as you can without damaging your fabric, I find turning only the hot tap on is usually hot enough. Add enough water so the section of the garment you want to add the 1st colour to can sit fully submerged.
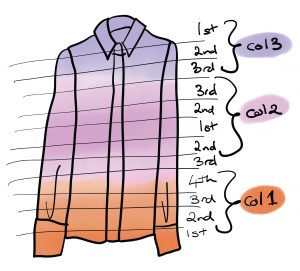
2. Add salt to the water along with your dye, add the dye slowly and use a scrap of fabric to check how the colour is looking. Make sure you shake your dye well and mix it with the water.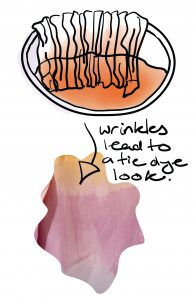 3. Add the first edge of the garment into the bucket, this is going to be the most saturated section. Depending on how large your garment is and how you want the sections of dye to sit will change how much you add to the bucket. I dipped in approx the first 5cm. It helps to plan out how you want the colours sectioned.
*Any wrinkles and folds will result in a more tie-dye effect, less folds will have a smoother ombre.*
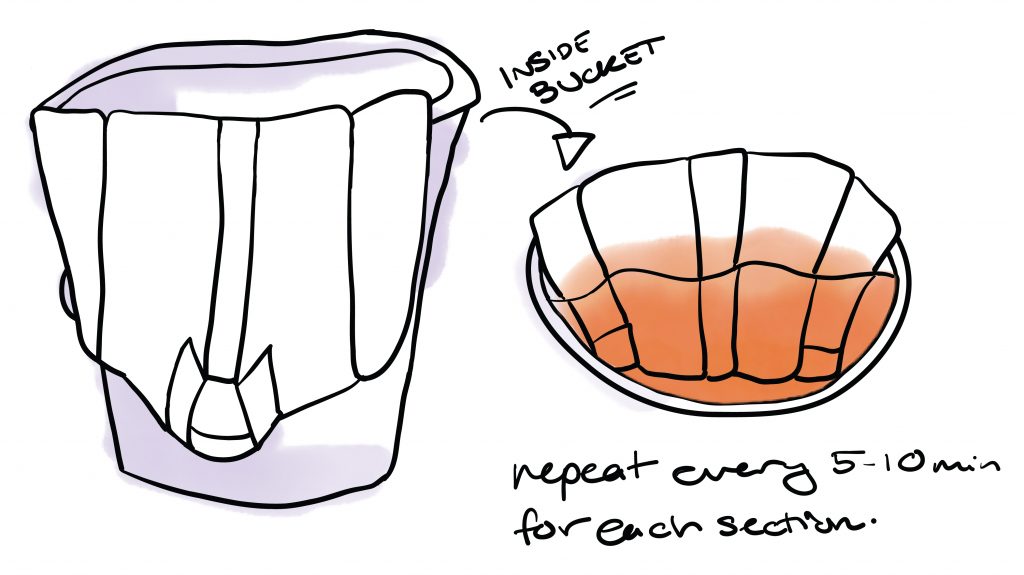
4. Every 5-10 mins dip more of the garment in. Again the amount you dip in will depend on how large the section is you’re dying.
5. For the last couple of sections you may want to add water in to dilute the dye.
6. Once you have finished the first section remove your garment and empty the bucket. Be careful not to get any dye on the undyed section of the garment.
7. Rinse the dyed section until the water runs clear (or at least mostly clear). Again be careful not to run dye water or get dye on the undyed section.
 8. The next sections will be done in the same way, keep the 1st section and future sections out of the way. Dip in the first bit and slowly add more as done for the 1st section. When you get to the end of the section slightly overlap the last dip with the last dip of the 1st section.
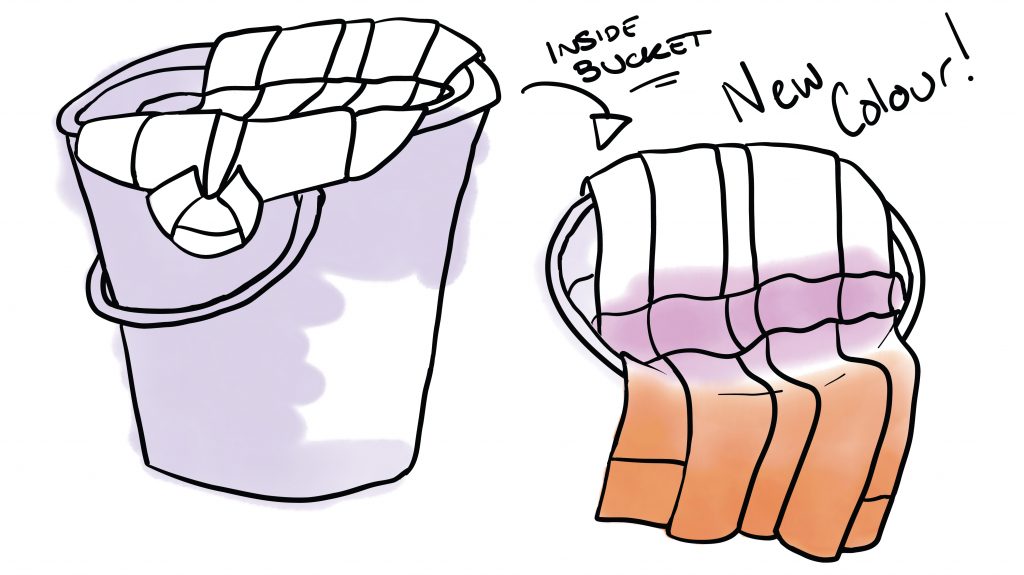
9. Rinse the second section the same way as the first and repeat the dying steps and rinsing steps until you’ve done as many sections as you like. Keep in mind if you have large sections the ombre won’t be as smooth.
10. Once all sections are dyed wash with detergent, I popped mine in the washing machine but a hand wash will do. Wash until the water is completely clear. Do not wash with anything you don’t want colour to possibly run onto!
11. Once dry remove any tacks, cut the button holes and add fray stop. Now wear your fab garment and get lots of compliments.
